As I’m starting the journey to build a custom arcade machine (my first) I decided to start with one of the most basic parts of an arcade machine; the controls. Although this is my first build I did some research to find out what would be a good balance between different kinds of games. Some games need certain layouts that differ from others; so finding a general balance between everything ended up being the goal.
After quite a bit of reading online I came across the website, slagcoin which has a plethora of information on arcade controls. Specifically, they focus on joysticks and button hardware as well as layouts and other technical stuff. Seriously, if you’re looking to build a custom joystick setup for arcade like games it’s a great starting point. There’s a lot of info on the basic electronics parts of joysticks and buttons which can be very helpful. The layout section is also very useful and that helped me to pick out a layout that I thought would work well for what I’m doing.
A big part of how arcade controls work is the controller board that translates joystick movement and button presses in to useful information for the game you’re playing. There’s a lot of cheap options out there on Amazon and I did look at those. Personally I wasn’t too impressed with those options because:
- They didn’t seem to have more than two player control options for quite a few although there are four player kits.
- Some of them only have one player controller boards meaning that player one is hooked up to one controller while player two is hooked up to a second controller, this can create a lot of USB cables and require a lot of USB inputs.
- Quite a few of them use LED lighting for the buttons (which isn’t necessarily bad) but could potentially interfere with some later upgrades to the cabinet. Light Guns (or the LED/LCD screen equivalent) and I like to keep it fairly dark in my room so bight LED’s might be annoying.
This isn’t to say that those options are actually bad. I’ve not purchased them so I can’t speak to the quality of the kits and if you’re going for something simple then one of them may be perfect for what you want. However, part of my plan is to allow for up to four players the same time so I wanted a way to map four sets of controls. I also wanted to ensure that I wasn’t using a USB port for each player since I decided that it would be faster not to use a USB hub. Additionally I feel that more input options are better so I did some more digging online. The two options I came up with were GroovyGameGear‘s KeyWiz USB Max and Ultimarc‘s I-PAC4. Both control interfaces support four players at once only using a single USB connection. While the KeyWiz USB Max supports 50 inputs (only 49 are assignable) the I-PAC4 supports 56 dedicated inputs. So I decided to go with the I-PAC4. I would like to note here that I am *NOT* sponsored by Ultimarc; I simply felt that for my needs it was the best option. GroovyGameGear’s control interfaces may be just as good if not better than Ultimarc–so if you’re building your own controls pick which ever you think is best.
While I was waiting for the I-PAC4 to arrive since I ordered it from them directly and they’re in the UK, I settled down to decide what joystick and buttons I wanted. Again I started on Amazon because it’s fairly easy to window shop and there’s usually a lot of options. Also it’s pretty helpful to have reviews to look at too with the understanding that some of them are either plants or written by people who may not understand the product. Again there are a lot of kits out there that you can buy so you can get one, two, or even four player joystick and button setup. I eventually settled on the SANWA Joystick and button kit due to:
- Everyone stated that the joystick buttons were the exact size that were specified meaning the 30mm buttons were exactly 30mm.
- The joystick is a fully working eight-way stick vs. a four-way stick which allows for diagonal movements.
- The joystick comes with an square restrictor plate pre-installed which I feel gives the best movement for generalized gaming.
- SANWA is one of the Japanese arcade control manufacturers that is used for professional, competition, and tournament play.
I wanted to get the best quality controls I could. Some of the cheaper brands may work fine for general gaming or for a cheap arcade machine and if you’re on a budget I don’t think cheaper options are a huge issue. A lot of what you choose is down to personal preference. I ended up ordering two button kits, a black one and a white one which allows to easily identify player one and player two setups.
Once all my parts arrived I ran down to the local hardware store and picked up some cheap hobby wood and hardware as well as some hookup wire. I had a design in mind and wanted to get started so I could see if what I thought would work. I also pulled a layout from the layouts page on slagcoin; I chose the SEGA layout for my setup. I printed the layout on paper so I could get a general feeling of the spacing before drilling any holes in the wood. I did find that for my needs I wanted to scoot the joystick itself over a little bit from the buttons to give me a little more room between the joystick and the buttons. After editing the layout to adjust for the joystick position and adding buttons for player one start and coin I had my final design.
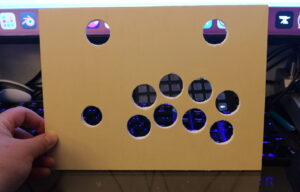
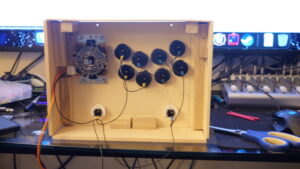
I had a very basic design that I drew out so I felt that I could get things going quickly so I got started cutting and drilling wood and made the top of the test box fairly quickly. Below you can see a picture of it.
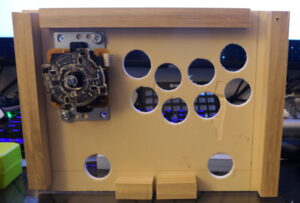
Since I chose to use a hole saw and I used fairly cheap hobby plywood there are some rough edges and some blow-out on the wood. For testing the layout and controls I felt this wasn’t going to be an issue. Initially I had planned on mounting the I-PAC4 on the back of the box but discovered that there wasn’t going to be enough room for it so I ended up having to move it to the bottom of the box. I also installed hinges on the box so it’s easy to open and access everything. Here’s a picture of the top of the box with the joystick installed.
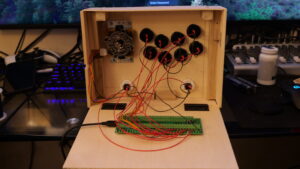
I finally got everything installed in the box and proceeded to start working on the wiring. While I am not a professional electrician I do have professional training on wiring electronics. While wiring something like this is low voltage and amps, if you don’t know what you’re doing don’t attempt on your own. While the risk of personal injury is low it is possible and you can damage parts which can get expensive. OK, disclaimer out of the way, I decided to wire the ground for each switch together in a daisy chain style setup since ground is common. This is actually a typical practice for arcade machine controls although it does run the risk of giving you issues if you have a break in the chain. You can see the set up in this picture:
After wiring all the ground wires up I moved on to wiring the power wires. Each button uses a microswitch and each switch has two wires, power and common. When the button is pushed the microswitch closes internally and makes a connection between the power and the ground which completes the circuit and allows the I-PAC4 to see input. With the button not pressed down there’s no connection and therefore no input. Due to this, each button needs a single wire for power and you can’t daisy chain the power wires together. If you look closely you can see that the joystick comes with it’s own mini wiring harness and there’s five wires on it; one for the ground and then one for each microswitch since the joystick uses microswitches to determine which way the stick is pushed.
As you can see from the picture above everything is wired up to the I-PAC4 for player one. Some people might look at the wiring and comment that it’s pretty long. This is true but I did this on purpose because I wanted to leave plenty of room for the wires to be able to move when I opened the box up to access the insides. Pulling a wire out of something when it’s not intended to be pulled out tends to result in damage to the wire and sometimes the hardware.
So after several hours the result was a working arcade setup that runs on any USB enabled device! I did test it with an emulator and it works great. Below is a picture of the control box closed so you can get an idea of what it looks like. There’s a few extra holes due to me having to move things around and the box is not perfectly square since I ended up rushing to finish it (I don’t have a workshop and when it’s over 100 degrees outside you don’t want to be outside cutting stuff for hours) but it works for testing and as a concept.
-J
